Existing website owners are converting HTML to WordPress Theme or switching formats to get interfaces with enhanced user engagement capabilities. Such users must know how to add push notification to WordPress websites. This will help them to re-engage their subscribers as well as other visitors. Push notifications are delivered the moment people open their computers or another compatible device. Moreover, these messages are not intrusive as they are sent only after users allow the sender to do so. Before learning about the procedure to introduce this feature on WordPress, let’s take a look at its definition.
What Is Web Push Notification?
A push notification is a clickable message that can be delivered to subscribers on desktops and smart devices. These messages are usually visible in the designated notification area of the device being used. They are also displayed in browsers even if the website from which they have been sent is not open. Their content is brief informing users of the latest updates which they can see by clicking the notification.
Let’s see how these notifications can be enabled on WordPress interfaces.
How To Set Up Web Push Notification In WordPress?
WordPress users can employ the following procedure to enable the feature on their interfaces:
1. Install A Plugin
We will be using a plugin to add the feature. OneSignal is a cross-platform push notification service which helps people in quickly setting up the feature. It has also created an open source plugin software for WordPress users. The first step is to download the installation of this handy tool. After the plugin is successfully installed on the interface, activate it and move to the next step.
2. Create An Account With The OneSignal Service
You will now have to register with the service by creating an account. Visit the OneSignal website for this purpose. On the home page itself, you will see options listed for mobile and web push notifications. Click on the web option and a registration screen will pop up. People can sign up with the service using their Google, Facebook or GitHub accounts. The registration can also be done by providing an email ID along with the name of your organization. You can set a password on this screen also. Choose a method which suits you and complete the subscription process.

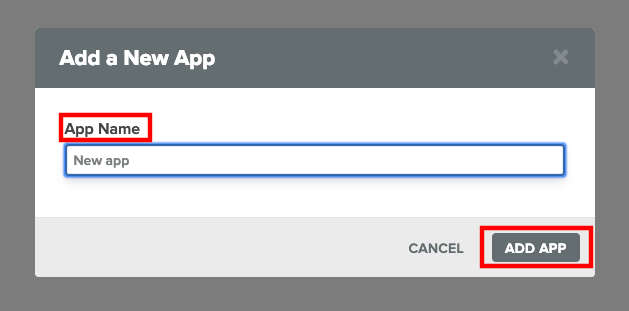
3. Create An App
In this next step to add push notification to WordPress websites, you will have to create an app. This application will help integrate the service with your interface. Log in to your freshly-created OneSignal account and go to the dashboard. Locate the “All Applications” option in the control panel. You will find a button named “Add App” in this section. Click on this tab to create a new application.

OneSignal will ask you to provide a name for the new app. Enter a name of your choice in the specified field and hit the “Add App” tab.
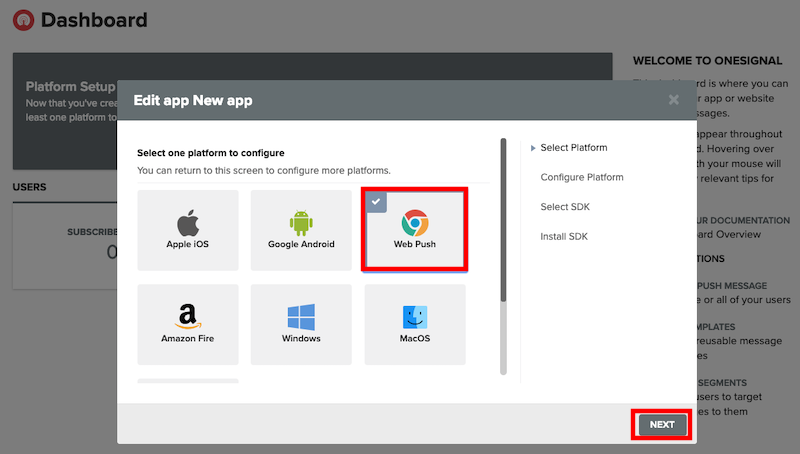
4. Configure The App Settings
Now, users have to configure their new application’s settings. They have to begin by choosing a platform for the app. They have the option to choose multiple platforms but in this tutorial, we will select the “Web Push” option. After making the choice, click “Next” to continue.
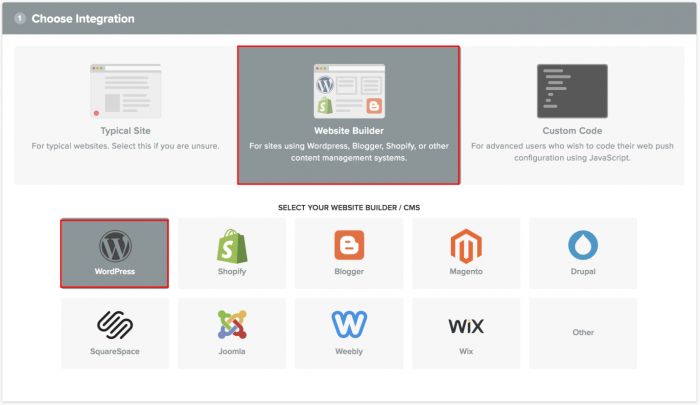
You will now be asked to select an integration method. Locate “WordPress Plugin or Website Builder” among the listed options and click on it. Scroll down and select WordPress as your website builder/ CMS.
5. Provide Your Website’s Details
You will now have to provide your interface’s details in the “WordPress Site Setup Section”. Enter the name of your website along with its URL in the specified fields. Users are also allowed to upload an icon of their interface. There is also a toggle option for declaring the HTTPS status of the website. Turn it on only if your interface does not have an SSL certificate. Push notifications can be sent only from a URL with HTTPS. Configure the settings and click on the “Save” tab.

You will now be presented with an app ID and an API key which you must copy.
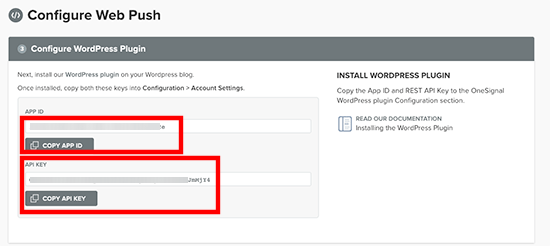
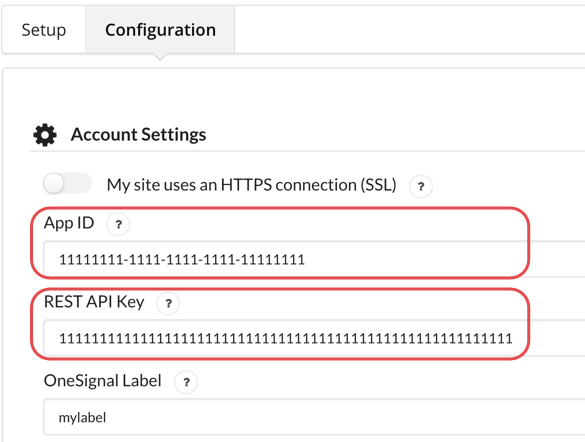
6. Configure The Plugin Settings
Head back to the dashboard of your website and go to the OneSignal plugin settings. Paste the App ID and the API key copied in the previous step in the correct places. This will allow your interface to send notifications in Chrome and Firefox browsers.
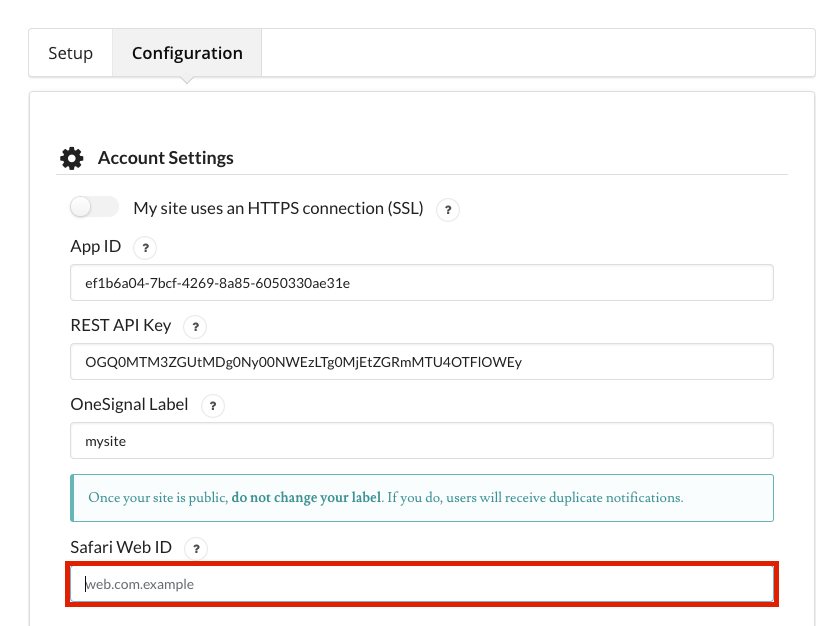
In order to enable the feature in Safari browsers, go back to the OneSignal dashboard to access your app settings. Click on the “Apple Safari” option and copy the Web ID.

Paste this ID in the appropriate field in the OneSignal plugin settings on your website.
Check your website in an incognito browser tab and you will see the push notification pop-up on the top.
Conclusion
This easy method to add push notification to WordPress websites will help website owners in boosting repeat visitor traffic. They will improve the engagement of visitors with their platform without using an irritating messaging system.
About Author:
Brandon Graves has vast experience in the web development field. Presently he works as a front end WordPress developer at HireWPGeeks – Best PSD to WordPress Company. He is fond of writing WordPress tutorials and always lookout for opportunities to interact with WordPress communities.


Comments